
In the realm of photography, the terms ‘Aperture’ and ‘F-stop’ are frequently bandied about, often confusing novice photographers. These two concepts play a pivotal role in controlling how much light enters your camera and impacts the final outcome of your image.
Understanding the relationship between Aperture and F-stop can take your photographic skills to new heights, allowing you to experiment with depth of field and light to create compelling images.
In this article, we will demystify the Aperture vs F-stop conundrum, steering you through their distinct functions and their intertwined relationship in the world of photography.

Related: Why Aperture is Important in Photography
Understanding Aperture vs F-Stop
Definition of Aperture
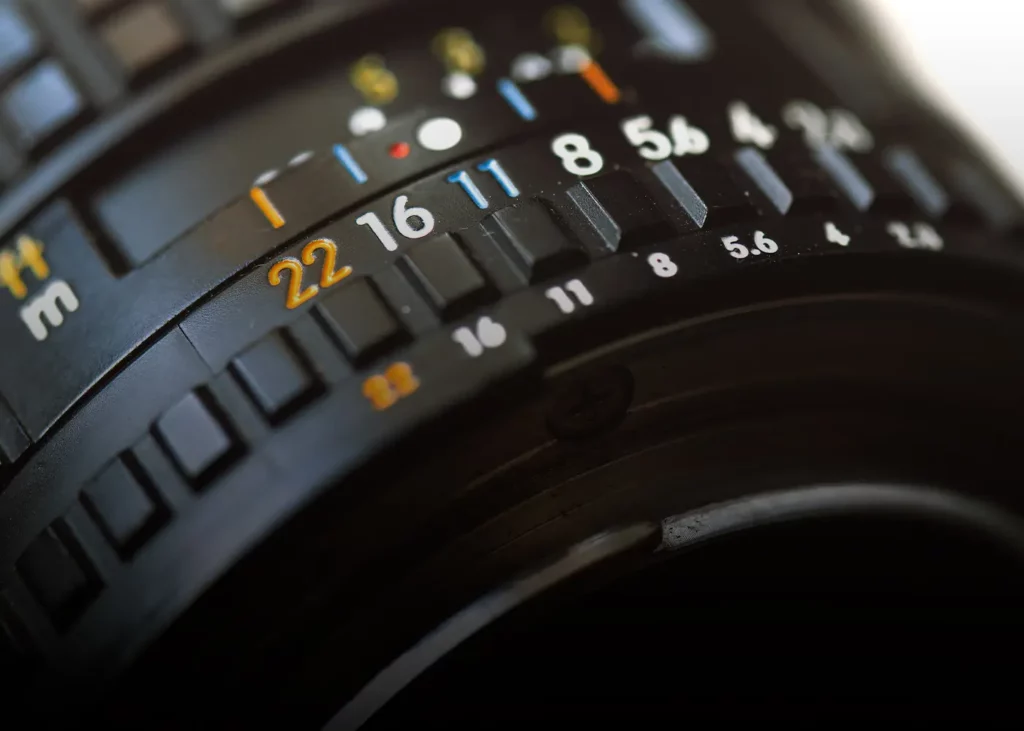
Aperture, in the context of photography, refers to the physical opening within the lens of a camera. It acts much like the iris of an eye, opening and closing to regulate the amount of light that reaches the camera’s sensor. Crucial to the quality of the image, the size of this opening is measured in what are known as f-stops.
Definition of F-stop
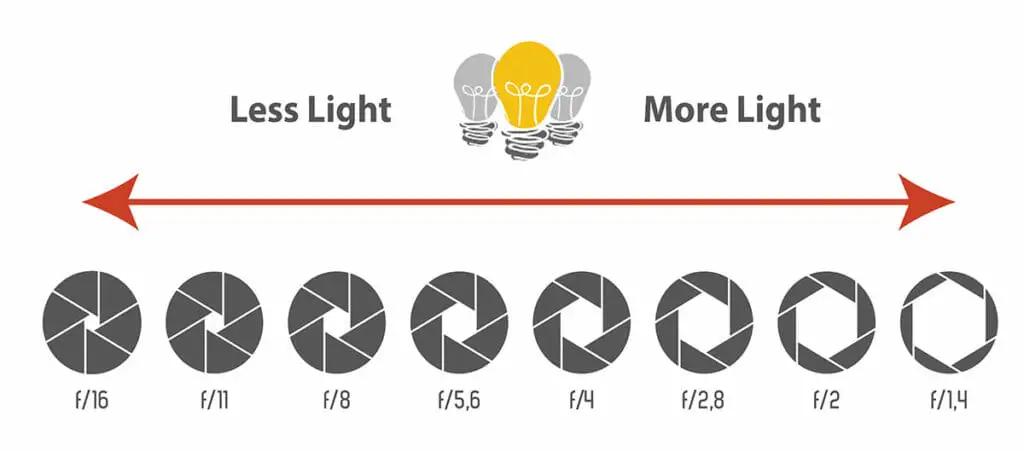
F-stop, on the other hand, is the numerical representation of the aperture size. It is essentially a fraction, with the aperture size being the denominator. Hence, the larger the F-stop number, the smaller the aperture and, consequently, the less light that is let in.
This is why it is said that there is an inverse relationship between f-stop values and aperture size. An image shot at F/1.8, for example, has a wider aperture and allows more light than an image shot at F/16.
The Role of Aperture in Photography

The aperture’s primary function in photography is to control the amount of light reaching the camera’s sensor.
Larger Apertures (Small F-stop values) and More Light
When the aperture is wide (small f-stop values such as F/1.8), it allows a significant amount of light to enter the camera. This is particularly beneficial in low-light situations or when a fast shutter speed is required.
A larger aperture also creates a shallow depth of field, making it an excellent choice for portraits or close-ups where you want to isolate the subject from the background.
Smaller Apertures (Large F-stop values) and Less Light
Conversely, a small aperture (large f-stop values such as F/16), restricts the amount of light that enters the camera. This is useful in brightly lit conditions or when you want to achieve a deep depth of field, where the majority of your scene is in focus.
Landscape photography, for example, typically utilizes smaller apertures to ensure both the foreground and background are equally sharp.
Why is Aperture Written as an F-number?
The reason aperture is written as an f-number, or f-stop is due to the mathematical formula used to calculate the diameter of the aperture. The ‘f’ stands for ‘focal length’. When you see an f-number, it means that the aperture diameter is equal to the focal length divided by the f-number.
For instance, if you have a 100mm lens set at F/2, the diameter of the aperture is 50mm. As you increase the f-number to F/4, the aperture diameter reduces to 25mm. This is why a larger f-number equates to a smaller aperture and less light entering the camera.
The f-number system provides a standardized scale for all lenses that allows photographers to quantify the amount of light entering the lens. This standardization is crucial as it ensures consistency of exposure across different lenses and camera types.
Impact of F-Stop on Photography
Understanding the impact of f-stop on photography is vital to controlling exposure and depth of field in your images.
F-stop Values and their Effect on Exposure
The f-stop values directly influence the exposure in your photographs. F-stop values are standard across all cameras and lenses, and these specific values form the f-stop scale or sequence. The most common f-stop numbers are F/1.4, F/2, F/2.8, F/4, F/5.6, F/8, F/11, F/16, F/22, and F/32.
These values represent a doubling or halving of the amount of light entering the lens as you move up or down the scale, respectively. For instance, moving from F/4 to F/2.8 doubles the amount of light entering the camera while moving from F/4 to F/5.6 halves it.
Lower F-stop Values and Brighter Images:
Lower f-stop values indicate a wider aperture, which allows more light to hit the sensor. As a result, images taken with lower f-stop values (such as f/1.8 or f/2.8) tend to be brighter.
This makes lower f-stop values an excellent choice for low-light photography, where additional light is needed to properly expose the image.
Higher F-stop Values and Darker Images:
In contrast, higher f-stop values (such as f/11 or f/16) correspond to a smaller aperture, which lets in less light. Images taken with higher f-stop values will, therefore, be darker.
This is especially useful in brightly lit conditions, where reducing the amount of light entering the camera can help avoid overexposure.
Relationship between F-stop, Shutter Speed, and ISO
The interplay between f-stop, shutter speed, and ISO is known as the exposure triangle. It’s a key concept in photography that helps you balance light to achieve a well-exposed image.
1. Balancing the Exposure Triangle
To balance the exposure triangle, you need to understand that each component affects the others. If you adjust the f-stop value, you may need to adjust the shutter speed or ISO value to maintain proper exposure.
For instance, if you increase the f-stop number (smaller aperture, less light), you might need to slow down the shutter speed or increase the ISO to compensate for the loss of light.
2. Adjusting F-stop to Control Light in Various Situations
In different lighting situations, adjusting the f-stop value can help regulate the amount of light that reaches the sensor. For instance, in a dimly lit room, a lower f-stop value (wider aperture) can allow more light in, resulting in a well-exposed image.
Conversely, in bright sunlight, a higher f-stop value (smaller aperture) can limit the light, preventing an overexposed shot. Therefore, understanding f-stop and its relationship with the other elements of the exposure triangle is vital to adapting to various lighting situations and achieving well-exposed photos.
Choosing the Right Aperture and F-Stop

Understanding the aperture and f-stop is just the first step. The real art lies in choosing the right settings based on your subject, the scene, and the desired outcome.
1. Aperture Priority Mode
Aperture Priority Mode is a camera setting that allows you to control the aperture while the camera automatically sets the shutter speed to achieve correct exposure.
Emphasizing Depth of Field or Background Blur:
In Aperture Priority Mode, you can emphasize the depth of field or the background blur according to your creative vision. By using a low f-stop, you can create a shallow depth of field with a blurred background, ideal for portraits or macro photography.
A high f-stop, on the other hand, will keep both the foreground and background sharp, a preferred choice for landscape or architectural photography.
Creative Decision-Making Based on Subject and Composition:
Aperture Priority Mode lets you make creative decisions based on the subject and the composition of your shot. Whether you want to isolate your subject from the background or have everything in focus, you can adjust the aperture accordingly and let the camera do the rest.
2. Manual Mode
Manual Mode grants you complete control over your camera, including the aperture and f-stop settings. It’s a step up from Aperture Priority Mode and lets you adjust all settings based on your requirements.
Complete Control Over Aperture and F-Stop Settings:
With Manual Mode, you have the freedom to choose both your aperture and shutter speed. This gives you complete control over the depth of field and the level of exposure in your image — a power that can be incredibly beneficial in tricky lighting conditions or for specific creative effects.
Experimentation and Learning Through Trial and Error:
Manual Mode encourages experimentation and learning. Trial and error is key to understanding how changes in aperture and f-stop affect your photos, making it an invaluable learning tool for those looking to master photography.
By regularly experimenting with different settings, you’ll soon learn how to estimate the right aperture and f-stop values for any given situation.
3 Common Misconceptions and Challenges about Aperture and F-Stop

Misconceptions and challenges often arise when beginners start learning about aperture and f-stops. Understanding these can help avoid common pitfalls and improve your photography skills.
1. Believing that Lower F-stop Values are Always Better
It’s a common misconception that lower f-stop values are always better because they allow for more light and create a shallow depth of field. But this is not always the case.
The best f-stop value is highly dependent on the context and what you’re trying to achieve with your photo. In situations where you want everything in the frame to be in focus, such as landscape photography, a higher f-stop is often more appropriate.
It’s important to understand that there is no one-size-fits-all f-stop value; the optimal setting depends on your creative vision for each shot.
2. Equating a Narrow Aperture with Poor Lighting Conditions
Another common misconception is that a narrow aperture (high f-stop value) automatically results in poor lighting conditions. This is not necessarily true.
A narrow aperture can still yield well-exposed images in brightly lit environments. In fact, higher f-stop values are often used in such conditions to prevent overexposure. Additionally, a narrow aperture can provide greater sharpness across the entire image, which is especially beneficial in landscape photography.
3. Overlooking the Impact of F-stop on Image Quality
The f-stop not only influences the depth of field and exposure but also has a significant impact on the overall image quality.
One of the challenges when using a high f-stop value is the diffraction effect, which can reduce image sharpness. Diffraction occurs when light bends around the edges of the aperture blades, causing the light rays to scatter and resulting in a softer image.
Therefore, while a smaller aperture (higher f-stop) might be beneficial for achieving a deep depth of field, it’s crucial to be aware of its potential impact on image sharpness and adjust accordingly.
Conclusion
In conclusion, understanding the intricacies of aperture and f-stop is crucial for photographers wishing to take their craft to the next level. These concepts are not just about controlling exposure or manipulating depth of field.
They are fundamental tools that photographers can use to shape their creative vision and produce stunning images. Remember, there is no one-size-fits-all setting, and the “best” f-stop will always depend on the scene in front of you and the story you want to tell.
So, experiment with different settings, learn from your mistakes, and never stop exploring the infinite possibilities that aperture and f-stop offer. It’s time to pick up your camera, venture out, and let your creativity shine!
Frequently Asked Questions
Are the Aperture and F-stop the same?
Contrary to common belief, aperture and f-stop are not exactly the same. While both are related to controlling the amount of light that reaches your camera’s sensor, they represent different aspects of this process.
The aperture is the physical opening in the lens through which light enters, and its size is controlled by a series of ‘blades’ in the lens that can expand or contract. The larger the aperture, the more light is allowed in.
On the other hand, the f-stop is the measurement of the aperture size. It is a ratio of the focal length of the lens to the diameter of the aperture. The f-stop values are written as f/1.4, f/2, f/2.8, etc., and oddly enough, the lower the f-stop number, the larger the aperture opening is and more light gets through.
Why is the Aperture measured in F-stops?
Aperture is measured in f-stops to provide a quantitative value that represents the size of the aperture opening in your lens. The term “f-stop” stands for “focal-stop”. It’s a ratio derived by dividing the lens’s focal length by the diameter of the aperture.
This ratio allows photographers to quantify the amount of light passing through the lens, which is crucial in achieving the desired exposure in a photograph. It may seem counterintuitive but remember: the smaller the f-stop number, the larger the aperture, and the more light that enters the camera.
This standardized measurement is what helps photographers across the globe to consistently communicate and understand aperture settings.
What is an F-stop on a Canon camera?
The f-stop on a Canon camera functions the same way as it does on any other camera. It is a measure of the size of the aperture, which is the opening in the lens that allows light to reach the camera’s sensor.
Canon cameras, like all cameras, use f-stop values to denote the ratio of the lens’s focal length to the diameter of the aperture. These are typically displayed on the camera settings as f/1.4, f/2, f/2.8, etc., with lower f-stop numbers indicating larger apertures and higher amounts of light entering the camera.
Different models of Canon cameras may offer different ranges of f-stop values, depending on the capabilities of the specific model and lens in use. It’s crucial to understand how to manipulate f-stop in order to control the depth of field and exposure in your photos.
What is an F-stop on a Nikon camera?
F-stop on a Nikon camera, as with any other camera, denotes the ratio of the lens’s focal length to the diameter of the aperture. The f-stop values are typically displayed on the camera settings as f/1.4, f/2, f/2.8, and so on, with lower f-stop values indicating larger apertures and a higher amount of light entering the camera.
Nikon cameras offer various ranges of f-stop values, depending on the specific model and lens used. Familiarizing yourself with f-stop manipulation allows you to effectively regulate the depth of field and exposure in your photographs, offering creative control over the final image.
What is an F-stop on a Sony camera?
F-stop on a Sony camera is a measurement that represents the aperture’s size, the opening in the lens through which light reaches the camera’s sensor. Similar to other cameras, the f-stop values on a Sony camera are indicated as f/1.4, f/2, f/2.8, and so on.
The lower the f-stop value, the larger the aperture opening, which equates to more light entering the camera. Various Sony camera models and lenses offer different ranges of f-stop values.
Understanding how to alter the f-stop on your Sony camera allows you to effectively control the depth of field and exposure in your photographs, giving you creative control over your final image.
What is an F-stop on a Fujifilm camera?
F-stop on a Fujifilm camera is a measure that denotes the size of the aperture, the opening in the lens that allows light to enter and reach the camera’s sensor. As with other cameras, f-stop values on a Fujifilm camera are displayed as f/1.4, f/2, f/2.8, and onwards.
The lower the f-stop value, the larger the aperture opening, allowing more light to reach the sensor.
Different models of Fujifilm cameras and their corresponding lenses offer a range of f-stop values.
Gaining a good understanding of how to adjust the f-stop on your Fujifilm camera allows you to manipulate the depth of field and exposure in your photographs, giving you greater creative control over the final image.