Have you ever wondered about how SD card lock works and what role that tiny switch on the side of your SD card labeled “Lock”? It’s not just there for decoration – it plays a vital role in safeguarding your precious data.
As the world becomes increasingly digital, understanding how tools like the SD card lock work can give you an edge in managing and protecting your data.
In this blog post, we will delve into the SD card lock function’s intricacies, offering insights into its operation and demonstrating why this lock feature should never be overlooked.
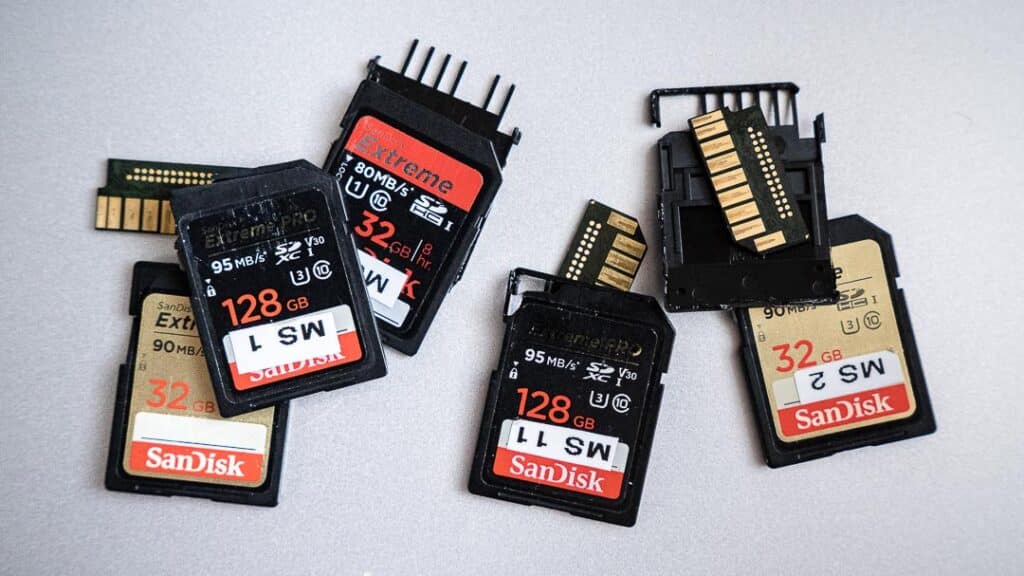
Related: What is the Difference Between an SD Card and Memory Card
What is an SD Card Lock?
The SD card lock, a small and often overlooked feature, is essentially a write protection switch. It’s a physical mechanism on the side of most SD cards, marked by a tiny sliding tab labeled “Lock.”
When the switch is locked, it prevents new data from being written onto the card and bars deleting existing files.
This means that all the precious data you have stored on the card — essential documents, memorable photos, or favorite music tracks — are secure from accidental erasures or malicious software when the SD card is locked.
Enabling or disabling it is as easy as sliding the switch on the card. This seemingly inconsequential feature can be a potent tool in your data protection arsenal.
How SD Card Lock Works?
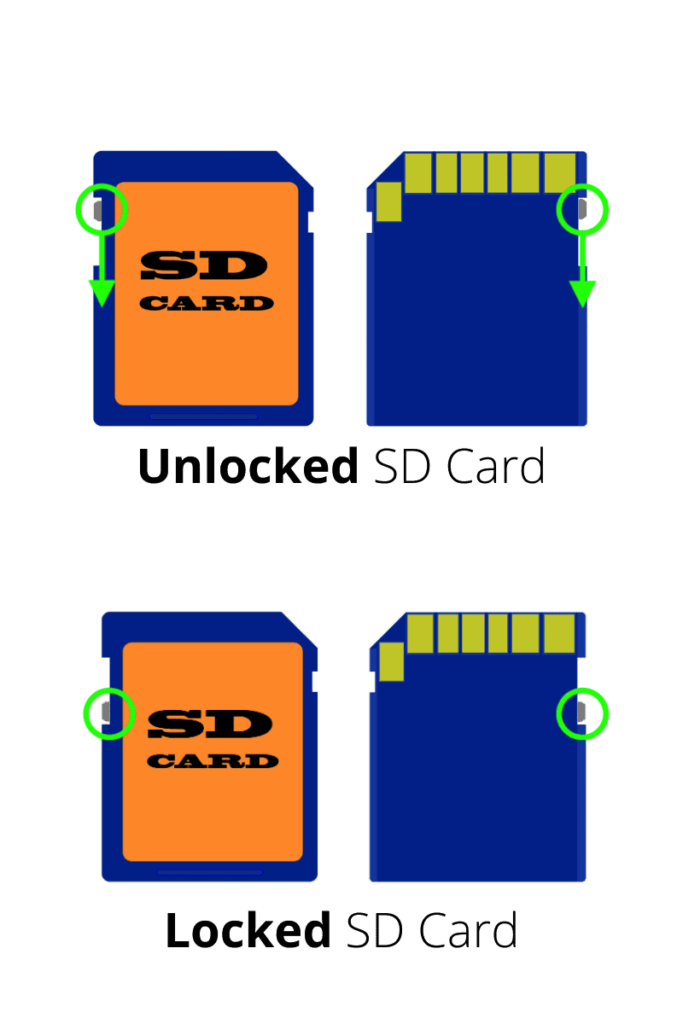
The operation of an SD card lock is charmingly straightforward. When you slide the lock switch into its ‘locked’ position, a sense line within the card gets interrupted. This alerts the device the card is inserted into that the SD card is in ‘write-protect’ mode.
As a result, the device refrains from making any write operations to the card, thereby safeguarding your data. Conversely, the sense line is not interrupted when the switch is in the ‘unlocked’ position, allowing the device to write to and delete files from the SD card.
This simple but effective mechanism provides a crucial line of defense for your valuable data. This protective feature is handy to prevent accidental erasures, protect sensitive data, or keep your data safe from threats like malicious software.
With this simple yet powerful tool, you can control when and how your data is accessed, offering an added layer of security for your valuable information.
What Is the SD Card Lock Position?
The SD card lock position refers to the state of the tiny switch on the SD card when it’s slid to the “Lock” label. This position is typically towards the bottom of the card when looking at it with the label facing up.
When the switch is in this lock position, the SD card is in ‘write-protect’ mode, safeguarding against any new data being written to the card or any existing data being deleted.
It’s the optimal setting when you want to ensure the preservation of your current data. Think of this position as the protective shield for your SD card, a shield that can be activated or deactivated with a simple slide of a switch.
How to Unlock an SD Card?
Unlocking an SD memory card is a straightforward procedure. Follow the steps below to unlock your SD card:
- Remove the SD card from your device: It can be your camera, phone, or computer. Be sure to power off the device before removing the SD card to prevent any data loss or damage.
- Locate the small switch on the side of the SD card: This is the lock switch.
- Slide the switch upwards or towards the side opposite to the “Lock” label: This action disengages the write protection, effectively unlocking the SD Card.
- Reinsert the SD card into your device: You should now be able to write new data to the card or delete existing files.
Why isn’t the Lock Position Clearly Shown on All SD Cards?
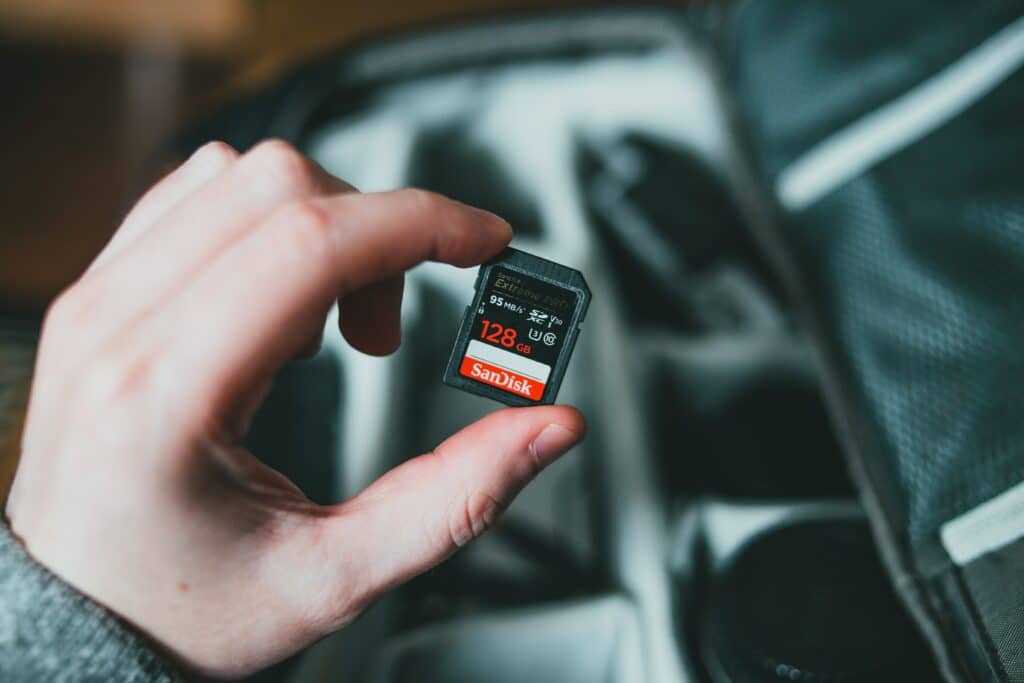
The lock position on some SD cards may not be visibly marked due to differences in manufacturers’ design choices.
While some manufacturers clearly label the lock position for user convenience, others may opt for a more minimalist design approach, excluding the label altogether. It’s worth noting that, irrespective of whether the lock position is labeled, the functionality remains constant across all SD cards.
This means that even if your SD card isn’t explicitly marked, you can still protect your data by sliding the switch toward the bottom of the card when it’s facing up.
When Should You Lock an SD Card?
Locking your SD card should be a strategic decision based on your need to protect its data. Here are some instances when it would be advisable to lock your SD card:
- Data Protection: If you’re handling sensitive data you can’t afford to lose, it’s a good practice to lock your SD card. This way, you prevent accidental deletion or modification of these crucial files.
- Transporting or Lending your SD card: If you’re going to be transporting your SD card or lending it to someone, it’s wise to lock it first. This step ensures that no new data can be written to it, and the existing data can’t be accidentally or purposefully deleted or modified.
- Virus and Malware Protection: If you suspect a device you are about to use might be infected with malware or a virus, lock your SD card before inserting it into this device. This action will prevent potentially harmful software from altering or deleting your data.
What Happens If You Use a Locked SD Card in Your Camera?
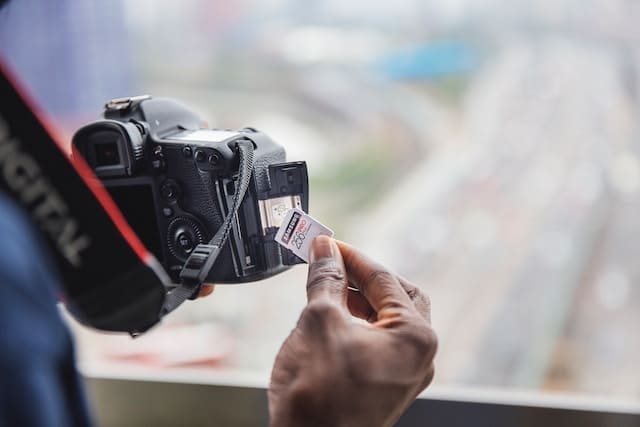
If you insert a locked SD card into your camera, the camera will recognize the card but won’t allow you to take new pictures or delete existing ones. This is because the locking mechanism engages the write-protection mode, preventing changes to the data stored on the card.
When you attempt to take a picture, most cameras will display a message on the screen indicating that the SD card is write-protected or locked. This safety feature is designed to protect your data from accidental erasure or modification, and it’s important to remember that the card hasn’t been damaged or corrupted.
To continue using your camera normally, remove the SD card, slide the lock switch into the ‘unlocked’ position, and reinsert the card. This will allow you to take and delete new pictures as usual.
Can a Locked SD Card Still Be Read On a Computer?
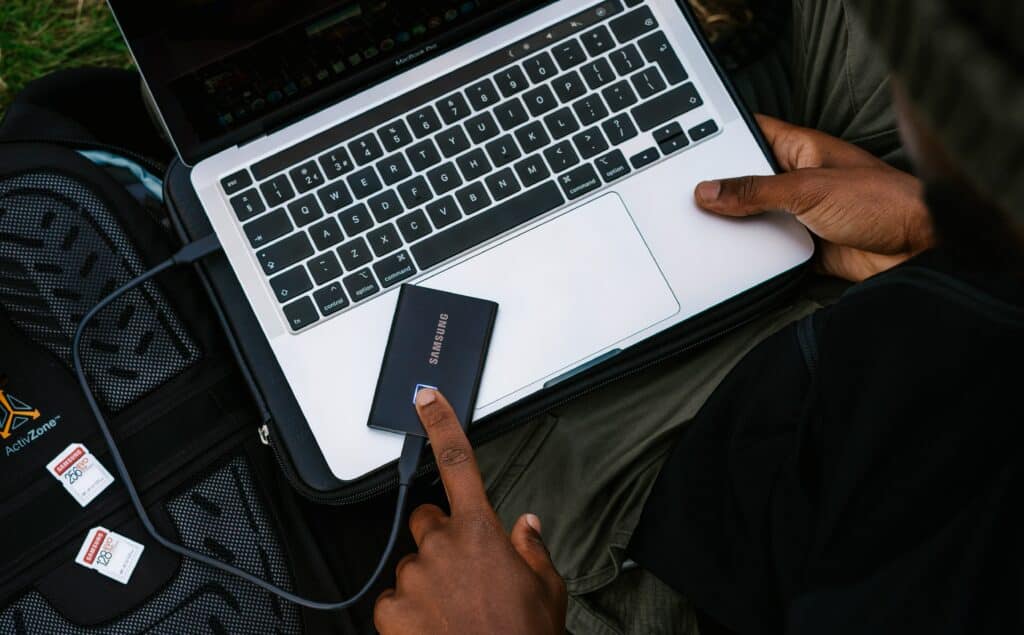
Yes, a locked SD card can still be read on a computer. The locking mechanism of an SD card does not impact its read functionality. Instead, it only restricts write operations, including creating, modifying, or deleting files.
When you insert a locked SD card into your computer, you can view, open, and copy files to your computer without any hindrance. However, you won’t be able to add new files to, delete, or modify the existing files on the SD card.
This feature makes the lock functionality a reliable way to preserve data on an SD card during transport or when sharing the card.
How to Lock or Unlock SD Card with CMD?
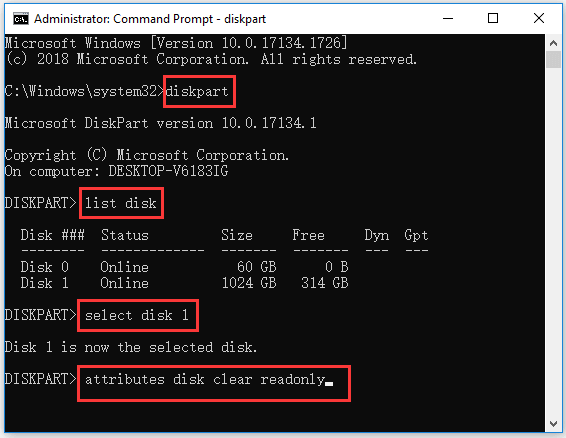
The Command Line Interface (CMD) on your Windows computer can be used to manage the write-protect status of your SD card.
While this method doesn’t directly use the physical lock switch, it provides another way to protect your data. Here’s how to lock and unlock your SD card via CMD:
Locking Your SD Card via CMD:
- Connect the SD card to your computer.
- Press “Win + R” to open the Run dialog box. Type “cmd” and hit enter to open the Command Prompt.
- In the Command Prompt, type “diskpart” and press enter.
- After that, type “list disk” and press enter. All the storage devices connected to your computer will be listed.
- Look for your SD card in the list and note its disk number.
- Now, type “select disk x” (replace “x” with your SD card’s disk number) and press enter.
- Type “attributes disk set readonly” and press enter. Your SD card is now write-protected.
Unlocking Your SD Card via CMD:
- Follow steps 1 to 6 as above to select your SD card in diskpart.
- Then, type “attributes disk clear read-only” and press enter. Your SD card is now unlocked; you can write to it again.
Please note that using the CMD to write-protect or unprotect a storage device should be done cautiously, as any mistakes could lead to data loss. Always ensure your data is backed up before attempting these procedures.
How to Unlock SD Card on Mac Computer?
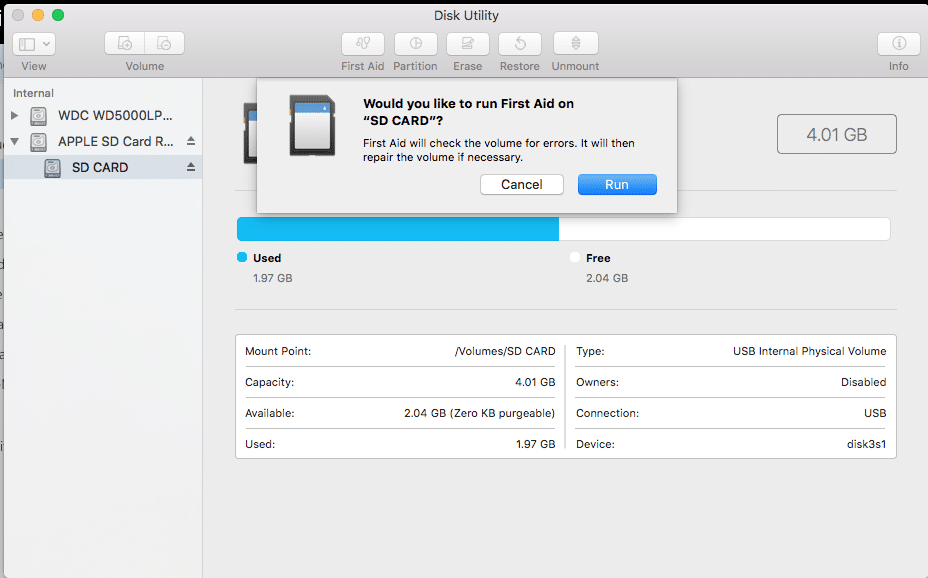
Unlocking an SD card on a Mac computer involves using the Disk Utility, a built-in program to manage internal and external storage devices. Here’s a step-by-step guide:
- Connect your SD card to the Mac computer.
- Open Finder, navigate to Applications > Utilities and then open Disk Utility.
- In Disk Utility, look at the left-hand panel and select your SD card from the list of storage devices.
- Click on the ‘First Aid’ button at the top of the Disk Utility window.
- A prompt asks if you want to run First Aid on your SD card. Click ‘Run.’ Disk Utility will then scan your SD card for errors and try to repair them, if any are found.
- Once the First Aid process is finished, your SD card should be unlocked and ready for use.
Please note if your SD card remains locked after this process, the issue might not be software-related. Check the physical lock switch on the side of the SD card to ensure it’s in the unlocked position.
If the problem persists, the SD card itself may be faulty, and it would be advisable to seek professional assistance or consider a replacement.
Conclusion
In conclusion, the lock feature of an SD card is a small but mighty tool that provides an essential layer of protection for your precious data.
It’s straightforward to use and acts as an invaluable safeguard against accidental file deletion, data corruption, or the threats posed by malicious software. Whether preserving cherished memories or securing sensitive information, utilizing the SD card lock can give you peace of mind knowing your data is safe.
Remember, the power to protect your data lies literally at your fingertips – all it takes is a simple switch slide!
Frequently Asked Questions
Should I lock or unlock the SD card?
Deciding whether to lock or unlock your SD card depends on your specific needs at the time. If you transfer the card between devices, it’s advisable to lock the SD card.
This action ensures your data remains intact during the transfer process, protecting it from accidental deletion or corruption. On the other hand, if you plan to use your SD card for storing new data, such as capturing photos or videos with your camera, you will need to unlock it.
Keep in mind; a locked SD card will not allow any changes to its content, including adding new files or deleting existing ones. The key is to use the lock function when you want to preserve the current content of your SD card, and unlock it when you need to make modifications or additions.
Remember, safeguarding your data is always a priority, and the SD card lock is a simple yet powerful tool in this endeavor.
Why do SD cards have lock switches?
SD cards have lock switches to provide an added layer of data protection. These small and handy switches on the side of the SD card allow users to ‘lock’ the card, thus preventing any changes to the stored data.
When the switch is in the ‘locked’ position, you cannot add, delete, or modify files on the SD card. This feature can be particularly beneficial when transferring the SD card between devices or when you want to prevent accidental deletion or modification of important files.
Therefore, the lock switch on an SD card is a simple and efficient method to safeguard your valuable data.